

หากคุณกำลังมองหา Plugin ที่ช่วยให้คุณโหลดหน้าเว็บไซต์เร็วขึ้น ซึ่งมันจะส่งผลโดยตรงกับการจัดอันดับบน Google วันนี้แนะนำ Plugin ที่ชื่อว่า WP Super Cache ตัวปลั๊กอินตัวนี้เป็นที่นิยมมากๆของ WordPress เพราะว่าช่วยจัดการเรื่อง cache ของเว็บไซต์ ทำให้เว็บไซต์ของเราโหลดไวขึ้น ในแง่การทำงานของมันก็คือ เก็บ cache ไฟล์ภาพ Javascript css เอาไว้ใน browser เรา เวลาเข้ามาอีกครั้ง ก็เอา cache มาแสดงแทนนั่นเอง
หากต้องการอยากรู้วิธีการติดตั้งยังไงให้ เว็บคุณเร็ว ติดสปีด ตามไปกันเลย
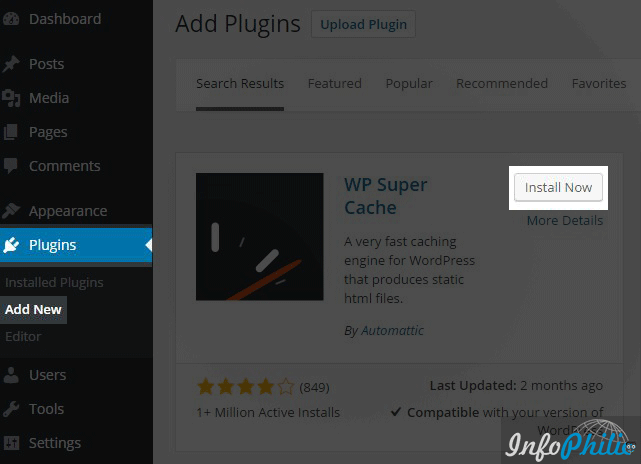
ขั้นตอนแรก ติดตั้ง Plugin WP Super cache
- ล็อคอินเว็บไซต์ wordpress ด้วย admin
- เลือกไปที่แท็ป Plugin
- เลือก Add New แล้วเซิส WP Super Cache ในช่องเซิสขวามือบน
- กดเลือกแล้วกด install
วิธีการตั้งค่า WP Super Cache แบบดีที่สุด ที่ใช้กัน
เข้าไปหน้า Dashboard ของ Wp Super Cache ด้วย Dashboard > Settings >> WP Super Cache

เลือก Caching on (Recommended)
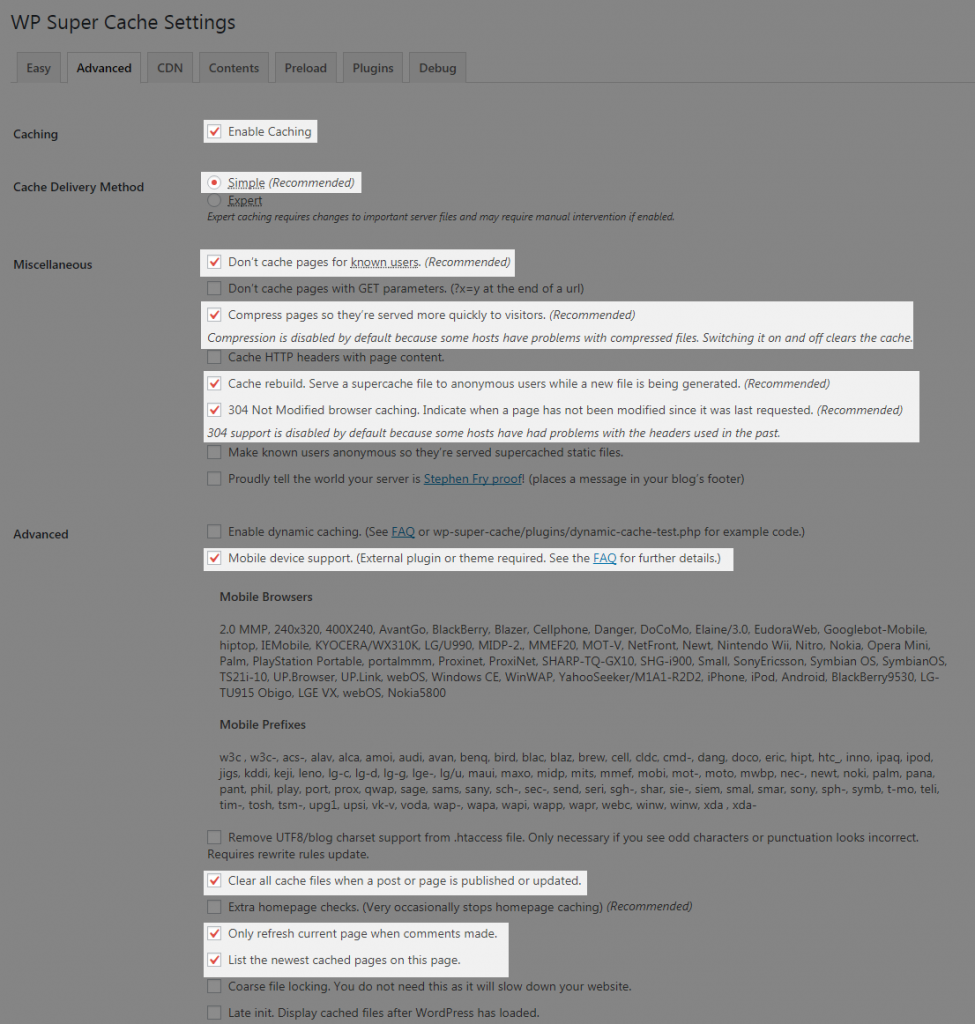
Plugin WP Super cache แท็บ Advanced
เมนู Caching
กดเลือก Enable Caching.
เมนู Cache Delivery Method
กดเลือก Simple (Recommended)
เมนู Miscellaneous
- เลือก Don’t cache pages for known users. (Recommended)
- เลือก Compress pages so they’re served more quickly to visitors. (Recommended)
- เลือก Cache rebuild. Serve a supercache file to anonymous users while a new file is being generated. (Recommended)
- เลือก 304 Not Modified browser caching. Indicate when a page has not been modified since last requested. (Recommended)
เมนู Advanced
- เลือก Mobile device support. (External plugin or theme required. See the FAQ for further details.)
- เลือก Clear all cache files when a post or page is published or updated.
- เลือก Only refresh the current page when comments made.
- เลือก List the newest cached pages on this page.
การตั้งค่าทั้งหมดในแท็ป Advance จะตั้งตามนี้
ขอบคุณข้อมูลการตั้งค่าดีๆจากเว็บไซต์ ต่างประเทศ https://www.infophilic.com/install-setup-wp-super-cache/


